QGIS doesn’t support pseudo-random fill patterns out-of-the-box. However, using the Geometry Generator we can achieve the same effect.
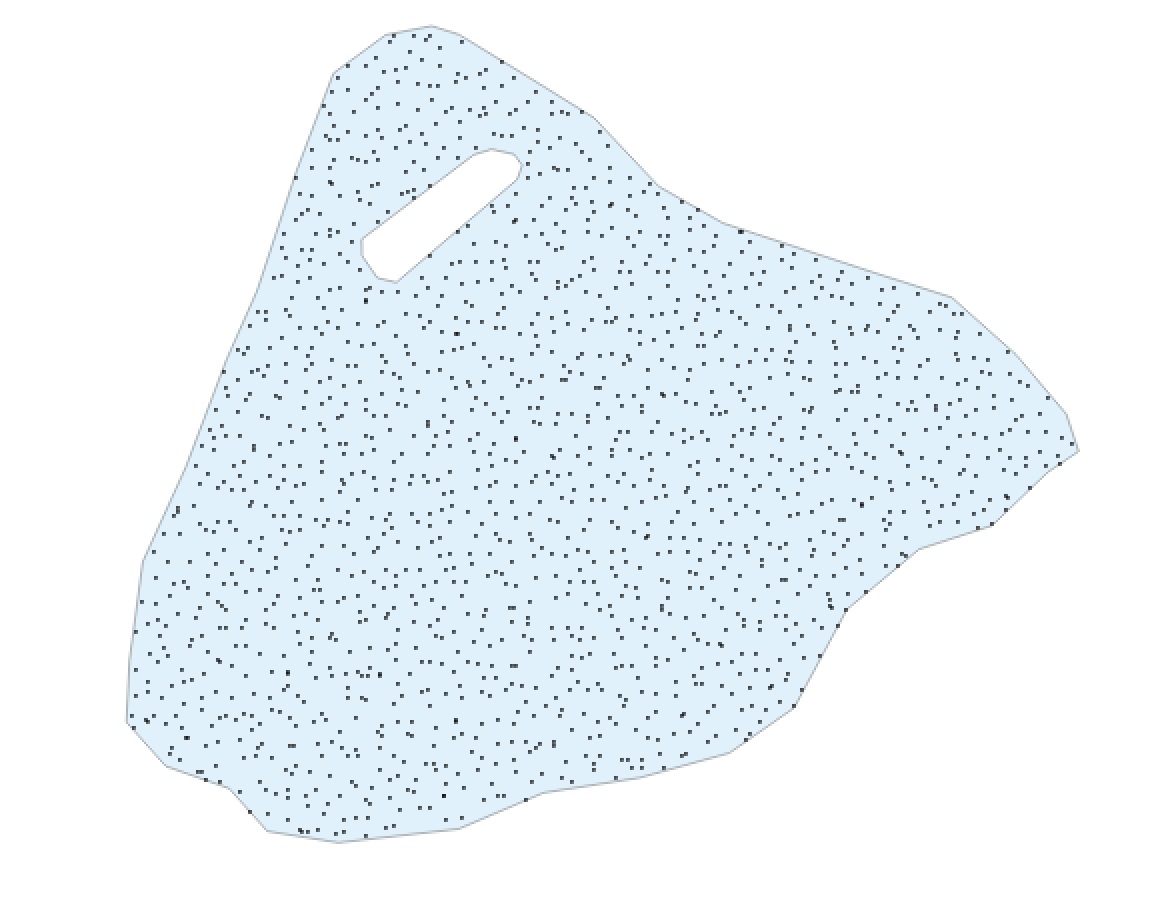
Random fill pattern? Here’s a polygon with such a fill. These are useful if, say, we want to represent an area of intermittent water.
A typical way to achieve this effect would be to generate a random fill texture and use a pattern fill. This is less computationally intensive to render, however QGIS cannot render a texture fill as a vector even in vector output formats, which means all vector fills will be rasterised. If that means nothing to you, don’t worry.
The typical way to generate a randomised fill pattern is firstly to draw a bounding box around the feature of interest, create a grid of points that covers the feature, then only retain those points that also intersect the feature of interest. In effect, the feature geometry is used as a clipping mask for a uniform grid.
For the points that remain after clipping, we can optionally add an amount of randomness to the X,Y value of each grid intersection between zero and the size of a grid element. With no randomness, of course we see the grid pattern.


The QGIS geometry generator comes in useful here as it can be fed the geometry of a feature, in this case a Polygon, that is fed to a PyQGIS script that returns a multipoint geometry which is then symbolised.
This file contains bidirectional Unicode text that may be interpreted or compiled differently than what appears below. To review, open the file in an editor that reveals hidden Unicode characters. Learn more about bidirectional Unicode characters
from qgis.core import * from qgis.gui import * import math import random """ Define a grid based on the interval and the bounding box of the feature. Grid will minimally cover the feature and be centre aligned Create a multi-point geometry at the grid intersections where the grid is enclosed by the feature - i.e. apply a clipping mask Random value determines amount of randomness in X/Y within its grid square a particular feature is allowed to have """ @qgsfunction(args='auto', group='Custom') def fillGrid(xInterval, yInterval, rand, feature, parent): box = feature.geometry().boundingBox() #Create a grid that minimally covers the boundary #using the supplied intervals and centre it countX = math.ceil(box.width() / xInterval) countY = math.ceil(box.height() / yInterval) #Align the grid gridX = countX * xInterval gridY = countY * yInterval dX= gridX - box.width() dY= gridY - box.height() xMin = box.xMinimum() - (dX/2) yMin = box.yMinimum() - (dY/2) points = [] #+1 to draw a symbol on the n+1th grid element for xOff in range(countX+1): for yOff in range(countY+1): ptX = xMin + xOff*(xInterval) + rand * random.uniform(0,xInterval) ptY = yMin + yOff*(yInterval) + rand * random.uniform(0,xInterval) pt = QgsPointXY(ptX,ptY) point = QgsGeometry.fromPointXY(pt) if feature.geometry().contains(point): points.append(pt) return QgsGeometry.fromMultiPointXY(points)
Finally, in the symbology options for the layer, select ‘Geometry Generator’ as the fill for the layer, and call the Python function with values for X/Y intervals and the proportion (0-1) of randomness to add.
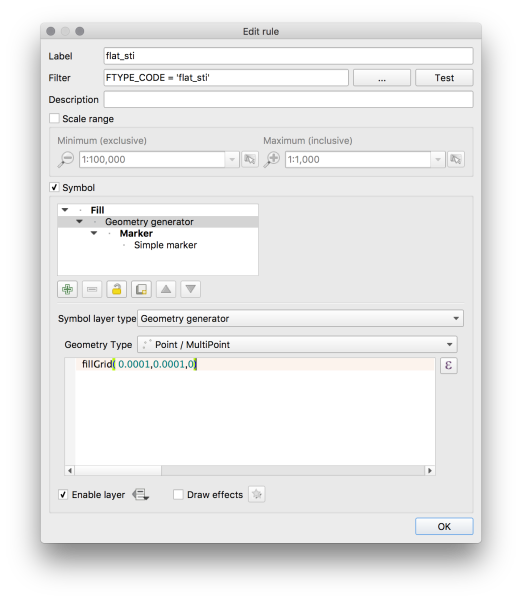
Note that the multipoint geometry returned is: independent of the zoom level, uses the units of the source layer. The eagle eyed may have noticed that in the screenshots above that a projection appears to have been applied. Indeed it has. The source layer uses WGS-84 (degrees), but was projected to Transverse Mercator (metres) for rendering.
Also, the fill is not cached. All redraws will trigger a re-calculation of the fill pattern, which is rather inefficient.
Tackling scale and CRS dependence are topics for a later post.
Edit: 07 Oct 19 – Updated code to use QgsPointXY and edited for clarity.

Qqis 3.4.2:
script error: type object ‘QgsGeometry’ has no attribute ‘fromPoint’
sorry not working 😦
LikeLike
Ah yes, thanks for pointing this out. The QGIS API was changed to handle points with Z values. As we’re only dealing with X/Y data the correct class is now QgsPointXY, calling fromPointXY().
I’ll update the example.
LikeLike